Friday, May 31, 2013

Quilted Postcards

This is the third postcard that I created. With much help from friends!!! I will have links to their blogs also to help with the construction of your very own postcards!!!

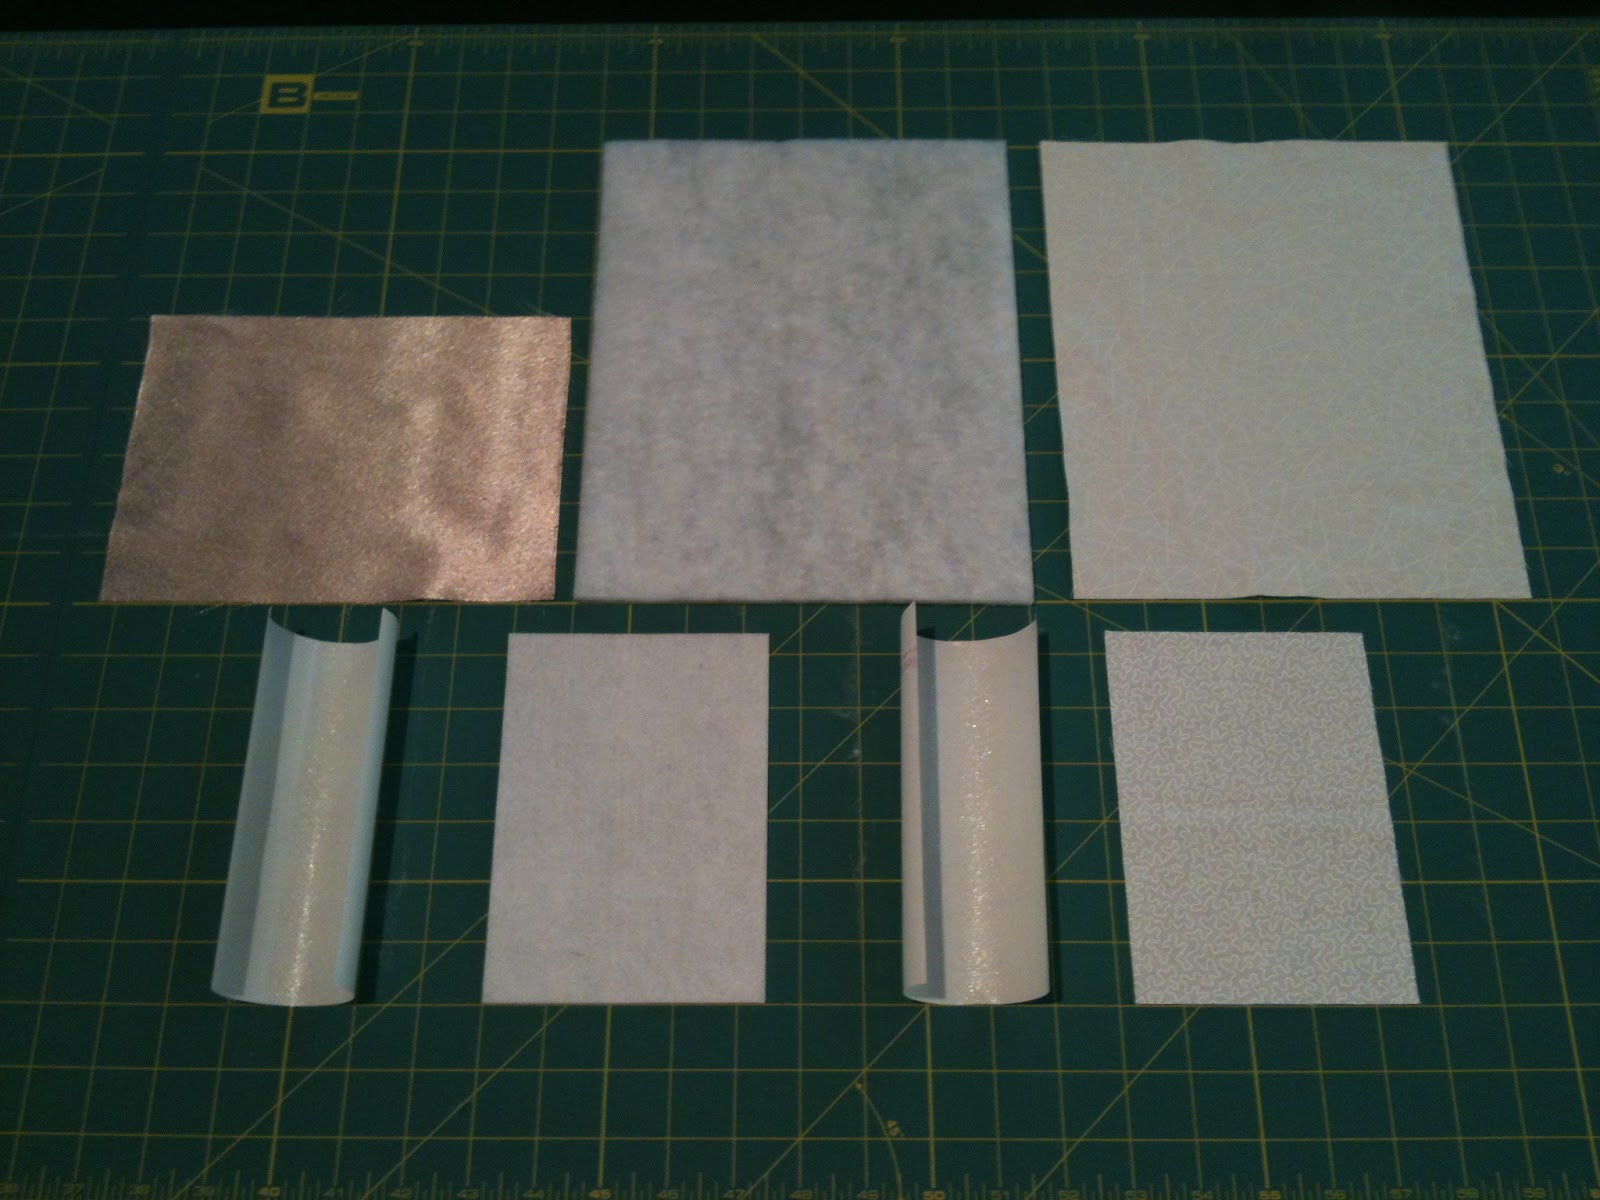
Materials cut and gathered for the postcard shown above.
From L to R starting at the top: top quilt fabric, batting, backing of quilt, Heat-n-bond lite, Peltex, Heat -n-bond lite, backing of postcard.
This is what gives the postcard the stiffness and strength.
The fusible I am using. I read somewhere that this is horrible and don't use it, but I haven't had any problems with it!!??
The batting I am using!!
The finished size of my postcards are 4" X 6"

I cut my pieces larger than needed for safety reasons and any mistakes in the final cutting. It gives me a little room for errors :)

This is how I do it:

Cut quilt top 6" X 8"
Cut batting and quilt back 8" X 10"
Cut Heat-N-Bond 4/18" X 6 1/8"
Cut Peltex and Postcard back 4 1/4" X 6 1/4"

Place your batting on to the quilt back and the quilt fabric on top of that. You can pin the edges if needed. You can also just hold the little sandwich down and begin quilting. Wear your quilting gloves for this!!
I did not pin this little quilt and had no problems.
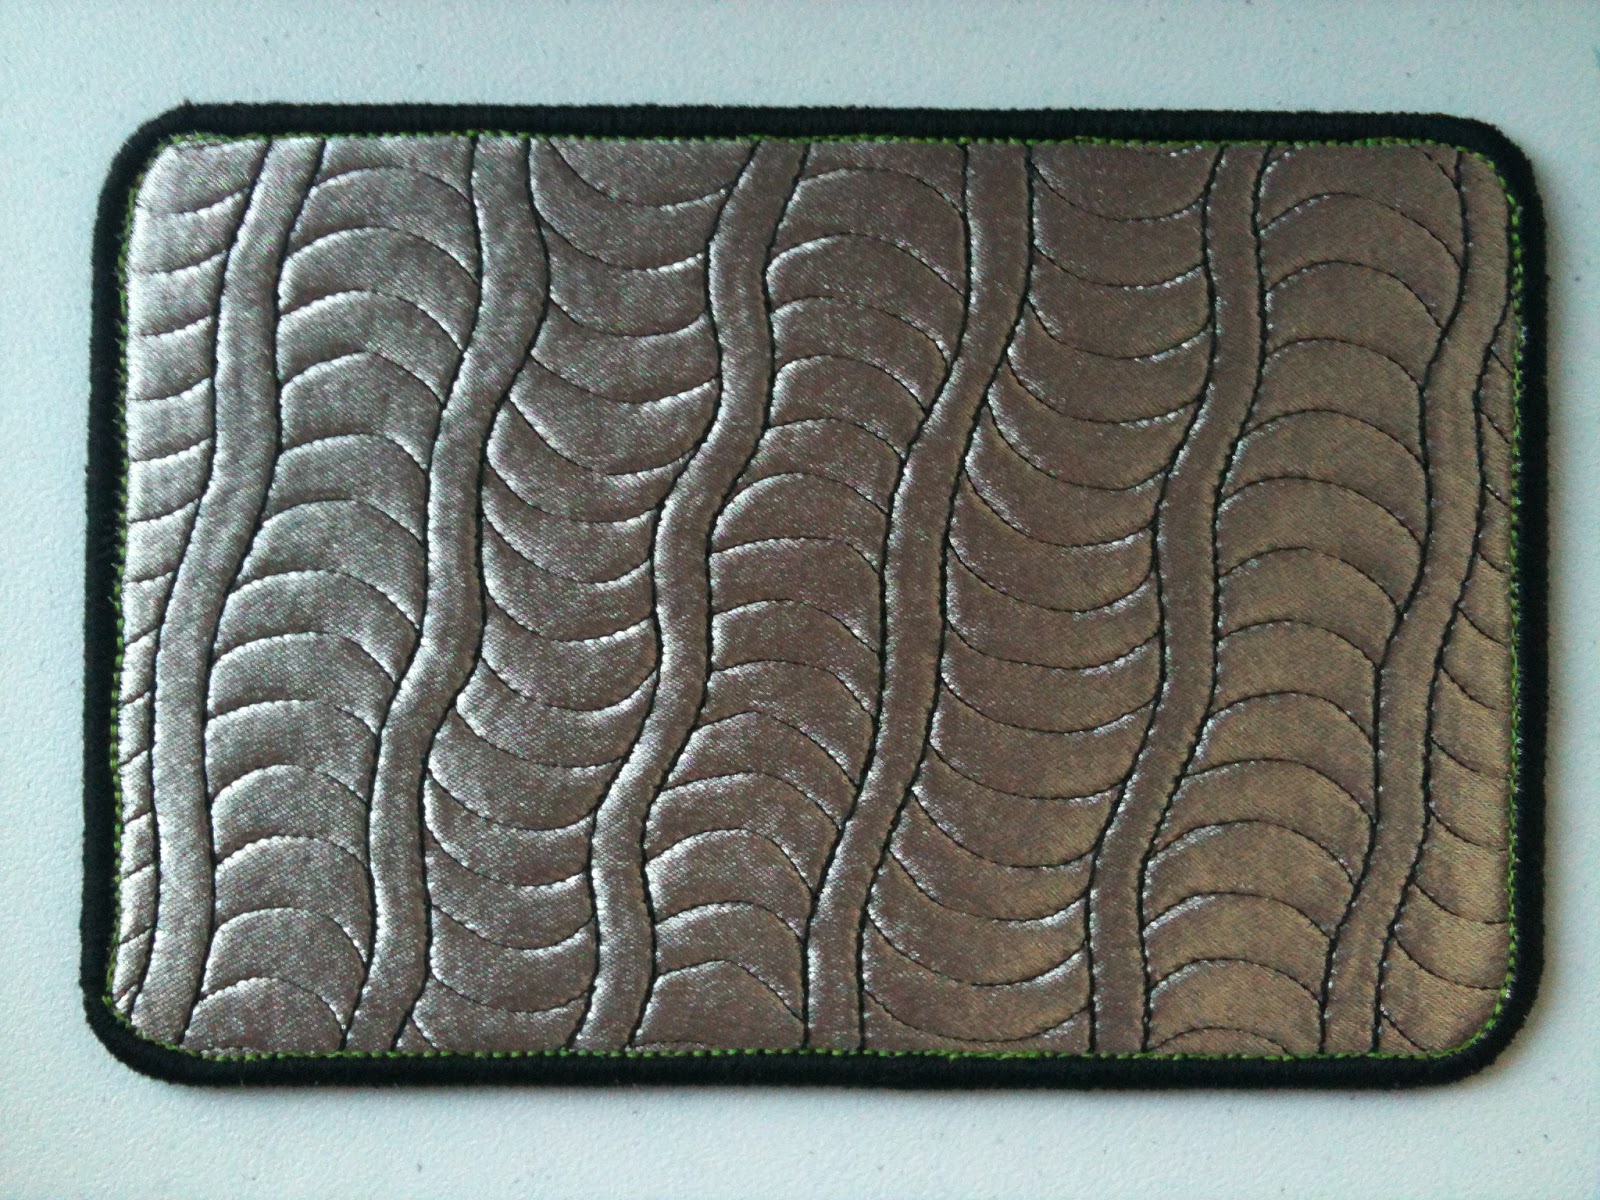
Quilting done!
Fuse the Heat-N-Bond to each side of the Peltex, leaving the paper backing on!!
Now, remove the paper from one side only.
Fuse the back of the postcard to one side.
Remove the paper backing from the other side.
Fuse to the back side of your little quilt. This takes a little more time because of the thickness you are working with.
I press on both sides at this point using a presser cloth to protect my fabrics!!
Trim your fused piece to 4" X 6". You can see that I cut this one a little off kilter!!
All trimmed!!!
Now to round out the corners.
I used a nickel to trace around to get that perfect rounded edge look.
All traced and ready to cut with a good pair of scissors.
Done and ready for the last bit of stitching!!!

First a row of regular, wide, zigzag.
Then a satin stitch around the whole postcard!!!
Using a Micron pen, I put the typical lines you find on a postcard on the back and write POSTCARD in the center top. If you are going to mail it to other countries, you need to have the marking placed in certain areas!!

My first Postcard!!
Postcard #2
And Postcard #3.
This has been a lot of fun to do and I am planning on making more!!! I know that these can be mailed, but you want to bring them to the post office to mail them!!!

Here are a couple other blogs to learn more about making quilted postcards!!!
http://www.sewcalgal.blogspot.com/2013/04/2013-free-motion-quilting-challenge-4.html
And check out Janets blog on her tutorials!!! http://janslittlebitextra.blogspot.co.uk/2009/05/postcard-tutorial-part-one.html and http://janslittlebitextra.blogspot.co.uk/2009/05/postcard-tutorial-part-two.html

Have fun on this project, I sure did!!!

Happy Quilting everyone, Take care and keep those scissors sharp!!! Martha

Monday, May 27, 2013

The Stitchin' Post in Sisters Oregon


Yesterday we drove to Sisters Oregon. It's about a 2 hour drive from home. Our son, daughter-in-law, and grandson were camping between Bend and Sisters on her dad's place. He has 10 acres and an amazing home!! Well of course I needed to stop at the quilt shop for a quick minute!!! :^0

The place was packed as they were having a 25% off sale. The selection was AMAZING!!! They have a lot of fabulous fabrics and I could have spend several hours and several THOUSAND dollars in there!! I am not kidding!!!!

So, with much self control, this is what I ended up with!!!


Love this thread!!!
I am planning on a whole cloth quilt with the white, and who doesn't need to add to the purple stash??!!

Take care everyone, Happy Quilting, have a safe Memorial Day and keep those scissors sharp!! Martha

Friday, May 24, 2013

Dear Jane's Little School

This is what I made today!!!
Our guild is having a challenge for our quilt show in September.!!
I saw some little red school house blocks on http://batikandquilt.blogspot.com/ and http://justtakes2.com/ I thought, what a fabulous idea!!! How fun to put  Dear Jane blocks within the school house block!!! So I drafted my own pattern to fit the Dear Jane 4 1/2" finished blocks and got to work.
I chose to use pink for my school houses. I will dedicate this quilt to all the little girls in the world who want to go to school and the teachers who risk thier lives to teach them in secret!!  It is so sad that so many are not allowed to learn simply because they are girls. It is incredible, truly, despicable!!
I made Dear Jane block C-3/Rayelle's Fence and assembled all the pieces. Sorry about the blurry photo!!
I even made a paper piece pattern for the roof. I am not great with angles. I actually earned an F in geometry in high school, so angles kind of send me into a panic!! :)
I borrowed the name for the quilt from these books that my Aunt Marie gave to me when I was 11 and visiting her in Fairhaven Massachusetts. She gave me the books on June 27, 1968. The books were given to her by Mary Sanderson and Mabel Gifford on Christmas day, 1937. I do cherish these books. I think I need to re-read them again!!!
This one is 76 years old!!
I am planning on making 9 blocks total to make a nice wall hanging!!! Or perhaps I will give it to the new grand-daughter due the end of September!!?? :^)
I am planning on doing a lot more sewing and quilting this holiday weekend!!! Four whole days to do what ever I want to do!! How fun is that?????????????

Happy Memorial Day everyone, take care and keep those needles sharp!!! Martha

Sunday, May 19, 2013

Quilted Post Card

All done and ready to mail.
I'm not sure if I will be mailing this, but it is ready in case I decide too!!
Satin stitching the edge with a variegated thread.
This was a fun lesson to learn. I still need to practice, especially satin stitching the corners, t-r--i-c-k-y!! But I am pleased with the result!!

There are many tutorials on how to make quilted post cards out there, and I recommend all of them. Each quilter gives a little different information which is really helpful!

I most definitely want to thank Janet McElroy (you can find her here!!) who really started the threads rolling for quilted post cards.Thank You Janet,  I wasn't sure about them but I am SO glad I tried it!! I can see that these may become contagious!!! :^)

And a thank-you to SewCalGal for hosting another awesome Free Motion Quilting Challenge for all people interested in refining their free motion quilting skills!!! Thank You SewCalGal!!!!! LOVE LOVE the challenges!!!

Take care everyone, Happy Quilting, and keep those scissors sharp!!! Martha

Sunday, May 12, 2013

It's For The Birds~Cardinals

Welcome to my day of,  It's For The Birds Blog Hop!!! This is the quilt I chose to share with you today!!
I started this little quilt over a year ago!!!! When I saw this blog hop I knew I had the perfect little quilt to share with you. Now I just needed to get it completed!!!

Here is the pattern by Connie D Roys.
I bought the pattern in a quilt guild yard sale. Someone had already started the quilt and gave up. The back ground moon was appliqued on to the two background fabrics. I added the little red border and brown border. I think I paid about $1 or $2, what a great find!!

I did hand applique using the glue stick method. You may notice that my quilt is opposite of the pattern. I didn't have time to trace all the pattern pieces as we were getting ready to go on a trip to Phoenix to see our son. So I copied the patterns using freezer paper and my copy machine.

I adhere the freezer paper to the right side of the fabric, cut out each pattern piece leaving a small edge to turn, apply a little glue, and fold the edges back using two seam rippers instead of using my fingers, until I see the freezer paper edge. Works for me!!!

Here's the quilt ready to layer and pin.
I add quilt extensions to the edges of my quilts. They are basted on using the same  seam size that I will use when putting on the binding. That way, I can quilt to the edge very easily. Once the quilting is done, they are removed quite easily!!!
Layered and pinned and ready to quilt!!
I drew  lines on the background to help me keep my quilting lines fairly straight on the the horizon.
I was trying to get the feeling of a haze in front of the moon. This took awhile to do and the blue lines did help!!
Almost done with the moon!
The background is totally done. Just need to finish a little more on the birds and branches.
Thank you for visiting!! I hope you enjoyed this little quilt. I am so glad to have it done and off the to do pile. I now have another quilt to hang for Christmas. Although, I think this one could be hung any time of the year!!!

If you have time, there are many more birders out there!! I've seen some awesome projects on this blog hop!

Enjoy your visit with the others who are participating!!!!