Saturday, November 30, 2013

GO DUCKS/And Thanksgiving treats!!

Civil War quilts at work. Beavers on the left, Ducks on the right!!
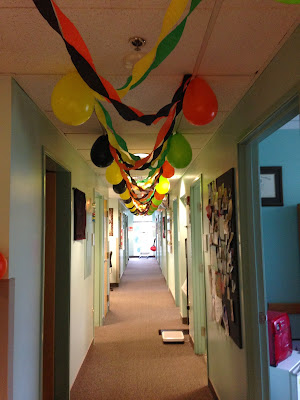
Our hallway at work. We decorated for both!!
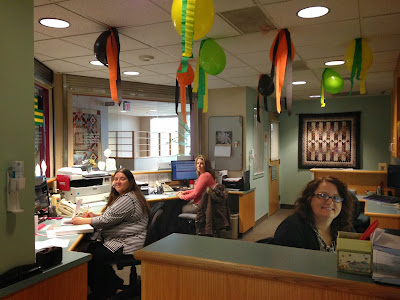
My wonderful receptionists. And I mean that!!! They are amazing women who make my job easier. They are efficient, kind, and simply amazing!! We decorated their area too!! :^)
I worked on this flag this past week. The OREGON was on the side and my husband didn't like it. So I cut it off and used black nylon flag material to make a whole new flag. We hung it up in our front window.
And then we were off to the game!
Here come the Ducks!!

Autzen Stadium, Eugene Oregon
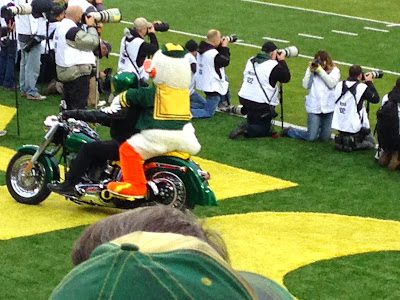
And here comes our mascot, our beloved Duck on a Harley!!


Yes, he rides in style!!


We won the game, by one point. It was a very intense game at the end. The Ducks did not play to their potential. The Beavers actually played a really good game, I think better than the Ducks. It was exausting!!

This is what our house looked like when we got home. We left in daylight. I put the flag in the window and positioned a lamp behind it, centered. Looks pretty cool with the porch lights in yellow and green!!
Thanksgiving Breakfast!!
Then I made KrumKake, my grandmothers specialty
Yum!!
And as I am making my KrumKake, I noticed the quilting designs in the iron!! Hmmmmmmm......

Now back to my quilting!!!!

Take care all, Happy Quilting, Go Ducks, and keep those needles sharp!!! Martha

Sunday, November 24, 2013

GO DUCKS!!!! Also: Hanging sleeve and label tutorial

done done done!!!! YES!!!
Very green on the back
I did very large wavy cross hatch quilting so that it maintained it softness as we will be using this quilt in the living room.
The design is from an American Civil War cot quilt. I started the quilt in 2011 to hang at work next to an Oregon Beaver quilt made by my manager. The first year my "quilt" hung as a quilt top. Last year it was half quilted. This year, it is completely done including the label and hanging sleeve!!!  

When I get a quilt done, there is still the binding to hand sew down to the back, the sleeve to sew on and the label to make and sew on. I decided to do it a little different on this quilt.

Hanging Sleeve and Quilt Label

If you are going to put your quilt in a show, the one requirement that most shows have is having a 4" hanging sleeve attached to the back.
My sleeves have morphed over the years, and I think I am finally happy with the design I currently use. I added a quilt label to this hanging sleeve which really saves a lot of time for me!! This is what I do/did.


Hanging Sleeve and Quilt Label

Measure across the top of the quilt where the hanging sleeve will reside.
Subtract 2 inches-this will be the length of your unfinished sleeve.

Make your sleeve: Quilt top width minus 2" X 9 & 3/4" (I like my sleeves to be a little larger than 4" )
If you decide to put your label into the sleeve, adjust your measurements. My label was 4.5" X  3.5" So my sleeve length needed to be:
Quilt top length minus 2" = A
A minus 4.5"- (label width) = B
B +  1" for seam allowance = C-length needed for hanging sleeve

You also need a strip of the hanging sleeve fabric the same width as your label.


Cut a section the same width of your label. Cut off 1.25" of the top
Sew the sections together.
Decide where on the hanging sleeve you want your label, cut , and sew the sections back together.
Hanging sleeve ready for construction!!
On each short end, fold in 1/4" and press
Fold again and press
Stitch seams down
Fold in half lengthwise and press.

All pressed and ready to be attached to the quiilt. Maddie is so very impressed!!!
Once I'm at the point of putting the hanging sleeve on the quilt, I pin it down on the back, then continue with my application of the binding on the front. That way the sleeve is a part of the whole quilt and cannot be removed very easily. Plus, it gives you a very sturdy hanging sleeve.

Binding all hand sewn to the back and now it is time to sew the hanging sleeve down.
I first pin the edge of the underneath side down, leaving the top free. You are actually making a tube now so that when you put a stick or rod, in you will not damage your quilt or quilting.
Pinned and ready to hand stitch. Notice that my pin on the left is at the 1/4" mark. I will stitch up to that point.
Hand stitching. I am a lefty!! Enough said!!
At the 1/4" mark, I make a good knot to keep that point secure. Then I pull back on the sleeve. Notice how you can see the crease? I will pull the sleeve back the entire length using the crease to help me measure 1/4".
Pin.
Notice the 1/4" crease?
And notice that the sleeve is not laying flat? This is what will give you space for a hanging rod and not contort your quilt.
Hanging rod tunnel!!
Label done and not easily removed!! And no handstitching the label on!!! YES!!
A little different than most quilt labels, but easier and a bit more permanent!!!
Maddie approves!!!


Take care, Happy Quilting and I hope I didn't confuse anyone!!?? If so, let me know and I will try to re-clarify my instructions!! Martha
Oh, and keep those scissors sharp!!!

Thursday, November 21, 2013

My Birthday Present!! A Charcoal Iron

This is what I got from my husband for my birthday!! How cool is that??!!

Definition

  • The charcoal iron is an ancestor to the modern electric iron. While today's irons use electricity to heat their metal bases and to generate steam, charcoal irons were heated by smoldering coals which were taken from a fire and placed inside a box on the top of the iron. The lid of the box had a handle which allowed people to hold the hot iron as they ran it over clothing, smoothing out wrinkles.

This iron is HEAVY!! Women must have been very strong to have used one of these!!! Seriously!!!!
Now I have two irons in my collection, both from my husband :^)

The iron on the left is a flat or sad iron. Sad irons, also called flat irons or smoothing irons, are shaped pieces of metal that are flat and polished on one side and have a handle attached to the other, created for the purpose of de-wrinkling fabric. “Sad” is an Old English word for “solid,” and the term “sad iron” is often used to distinguish the largest and heaviest of flat irons, usually 5 to 9 pounds.
The forebears to modern electric irons, these flat irons are often triangular or come to a point to make it easier to iron around buttons. The heft of a sad iron would help it hold heat, as well as to press the fabric flat. To protect fabric and surfaces from singeing, sad irons often came with metal trivetsto rest on, and these are often-beautiful, intricate, and collectible examples of metalwork that were made in a myriad of designs.
The earliest metal flat irons were forged by blacksmiths in the Middle Ages. These were heated on an open fire or a stove, and the metal handles had to be grasped with a thick potholder, rag, or glove. Women had to be careful not to track soot or ash on the clothing they were ironing.

I think my family would have been referred to as the family of Wrinkles, because there is no way I would have enjoyed working with either of these irons :^) And I am serious!!
And this is where they reside, next to my favorite piecing machine and small pressing station!! I have one of my sister's paintings, and my mom's vase that I grew up with. A very inspirational space indeed!!
I think I'll stick with my little iron on the left :^)
Happy Quilting, Take care and keep those scissors sharp!!! Martha

Sunday, November 17, 2013

Felting and making OSU quilted coasters

This is what I did on my birthday yesterday
crocheted a project
circular
made it up as I went as I do not read instructions very well!!
self taught lefty!!

I wanted to make a bowl to felt 
using two different wool yarns
done with crochet-I am a super slow knitter!!
ready to felt in the washer-I have a front load washer now and they are not the best for felting-but it is what it is
after the first hot wash
not bad but needs another round
but first I cut into the bowl and folded the edge down
Maddie wanted to pose with the bowl :^)
I hand stitched the fold down with the same yarn and actually trimmed up the flaps a bit
Maddie approves!!
It went back into the washer and it felted much better and is now in the hot dryer!! Fun stuff!!

I also made OSU coasters for our neighbor!
I don't usually have Beaver fabric in the house, but these are for a gift for a neighbor who just turned 90
He and his wife love the Beavers, so Beaver coasters it is!!

I had a really fun birthday just doing whatever I wished!!! 5 years to retirement!!! Wahoo!!!

Take care, Happy Quilting and keep those needles sharp!!! Martha