So here is my October challenge piece!! Done in the nick of time, again!!! I always start off with intentions of getting my lessons done early, but then I start designing and cannot seem to stop!!!
As you can see, there is more quilting to be done. I will quilt the 3 inch border surrounding the center piece and then quilt in between all the photos!! But the challenge part is complete! :^)
Our teacher for October was Teri Lucas and the lesson was in two parts. Part 1, we were start on paper, draw out our name and doodle different quilting designs around our name. I decided to use my other name, Nana, which my grandchildren call me. I also had my own Nana, which is the how and why I came up with this design.
 |
| My drawings for the quilt. I didn't follow what I had drawn, but I did have fun doing this!!! |
My Nana's name was Bjorga, and she came to America as a 16 year old from Norway in 1907. Her picture is on the left side of the quilt. There is also a photo of me on the right side at the age of 2 or 3, taken about the same time my Nana's photo was taken. So now I am the Nana, and I love it!!!!
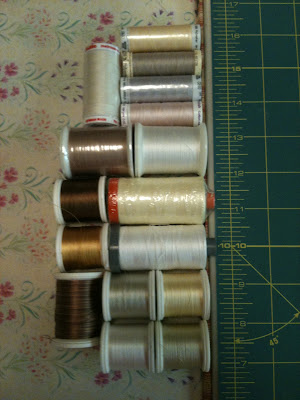 |
| These are the threads that I chose to do this challenge with. Weights ranging from 30wt to 100wt. I used YLI, Aurifil, Sulky, Superior, and Mettler, and they consisted of: silk, polyster, and cotton. I ended up not using all of them. I used the Superior Masterpiece 50wt for the bobbin on the entire quilt. |
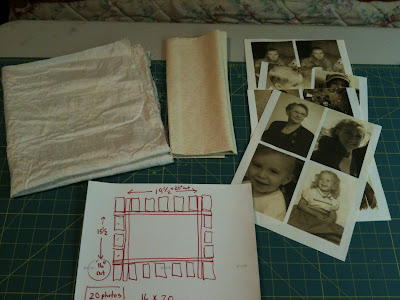 |
| Here's my plans for the quilt and all the photos ready to cut and sew. I was busy scanning, cropping and changing the photos to a sepia tone. Then printing them on the photo fabric you can purchase. I didn't have time to prepare my own fabrics which I would have preferred. |
 |
| photos cut to size and ready to sew |
 |
| borders added!! |
 |
| Dupioni silk center added to the borders, or visa versa :^) And my basic design added. |
Now , you will notice above, the flower next to Nana. That is part of our bonus tutorial from Diane Loomis. I loved that little flower and thought it would look awesome in my quilt. So I combined the two lessons and did some Trapunto, compliments of Diane, on my October challenge!!
 |
| trimming away the excess batting for the trapunto |
 |
| All pinned and ready to get the main parts quilted. I used QuiltersDream wool and cotton batting |
 |
| The main parts quilted. Notice the frame on the upper left!!?? I need to put a photo back in :^) I love the N on that frame and used it on my quilt!! |
 |
| Lovely :^) Thank-you for the flower Diane!! |
 |
| The back of the quilt. It's nice to remove the majority of the pins. It helped to lighted up the quilt and clear the path for quilting!! |
And now the progression of the quilting for the challenge. I will finish the border quilting later!!
 |
| And done!! I went back over the name with the Sulky 30wt so it would stand out more. |
So this was a great challenge for me. More like thinking outside the box, which isn't always easy. But the learning you get from doing that is priceless.
Thank-you Teri for a wonderful tutorial. I hope I succeeded in this challenge!! And thank-you to Diane for the tutorial on the trapunto and thanks to SewCalGal for hosting this amazing year of quilting challenges. The lessons and the people I have met have been amazing!! A priceless experience. I am grateful :^)
Take care everyone, Happy Quilting and keep those scissors extra sharp, especially if you are planning any trapunto in the future!! :^) Martha


